VirtualBox Guide
Last updated February 7, 2024
VirtualBox (VBox) is a popular hypervisor1 for x86 virtualisation. It allows you to create virtual machines, which are effectively emulations of computers on your computer. This allows you to use operating systems you do not have on disk, run programs that may be risky to run on your computer, or work with historical machines that are hard to find now.
We will use VirtualBox to create a virtual machine (VM) to contribute to the NYU Processor Design Team without having to install Linux natively or buy a new computer. VBox is a plug-and-play solution for all intents and purposes of the NYU Processor Design Team.
This guide will help you use the provided VM configuration with VBox.
Contents
- Minimum Requirements
- Virtual Machine Information
- Downloading VirtualBox
- Downloading the VM
- Importing the VM
- Starting the VM
- Logging In
- Homescreen
- Exploring your VM and Tips
- Configuring your VM
Minimum Requirements
-
CPU: Any reasonably powerful 64-bit x86 processor
(fancy for “most modern computers”) -
Memory: 8 GB RAM
-
Disk Space: 16 GB available space
(Virtual hard disks are dynamic and grow with usage. You do not need 16 GB available immediately, that’s just what the VM is set up for) -
OS: Any major 64-bit operating system such as Windows, macOS, and most Linux distributions
Note: If you already use Linux or macOS, you can start working immediately and do not need a VM, but nobody will stop you if you wish to use one regardless. Check the Lab Guidance page for what you need to have. Optionally, macOS users are encouraged to look at the Homebrew Installation Guide.
Virtual Machine Information
-
The provided VM is set up for VirtualBox >7.0.0, which means it is guaranteed to work with any version of VBox after 7.0.0
-
Currently, VirtualBox is on 7.0.14, as of writing this guide
-
The VM is set up with Ubuntu Desktop 23.10 Mantic Minotaur
-
The VM contains all tools you need to begin working right away
Specifications
-
OS: Ubuntu Desktop 23.10
-
Processors: 4 processors
-
Memory: 6 GB RAM
-
Disk Space: 16 GB
-
Appliance Size2: 8 GB
Note: You can edit these later to your desire if your computer has more resources to allocate to the VM.
Downloading VirtualBox
-
Go to virtualbox.org
-
Download the latest version of VirtualBox
Downloading the VM
-
Go here
-
Download the
.ovafile- OVA stands for Open Virtualisation Appliance
- It is a common file extension that hypervisors use
- The NYU Processor Design Team VM contains the entire OS, some applications, utilities, etc. and therefore, is ~7 GB.
Importing the VM
-
Open VBox
-
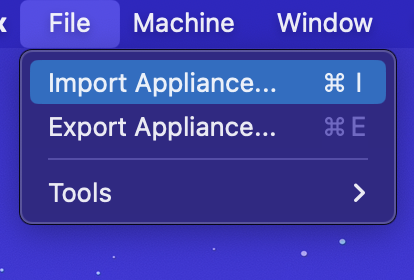
Click on “File” and then “Import Appliance”
-
Find the
procezzor.ovafile in your file system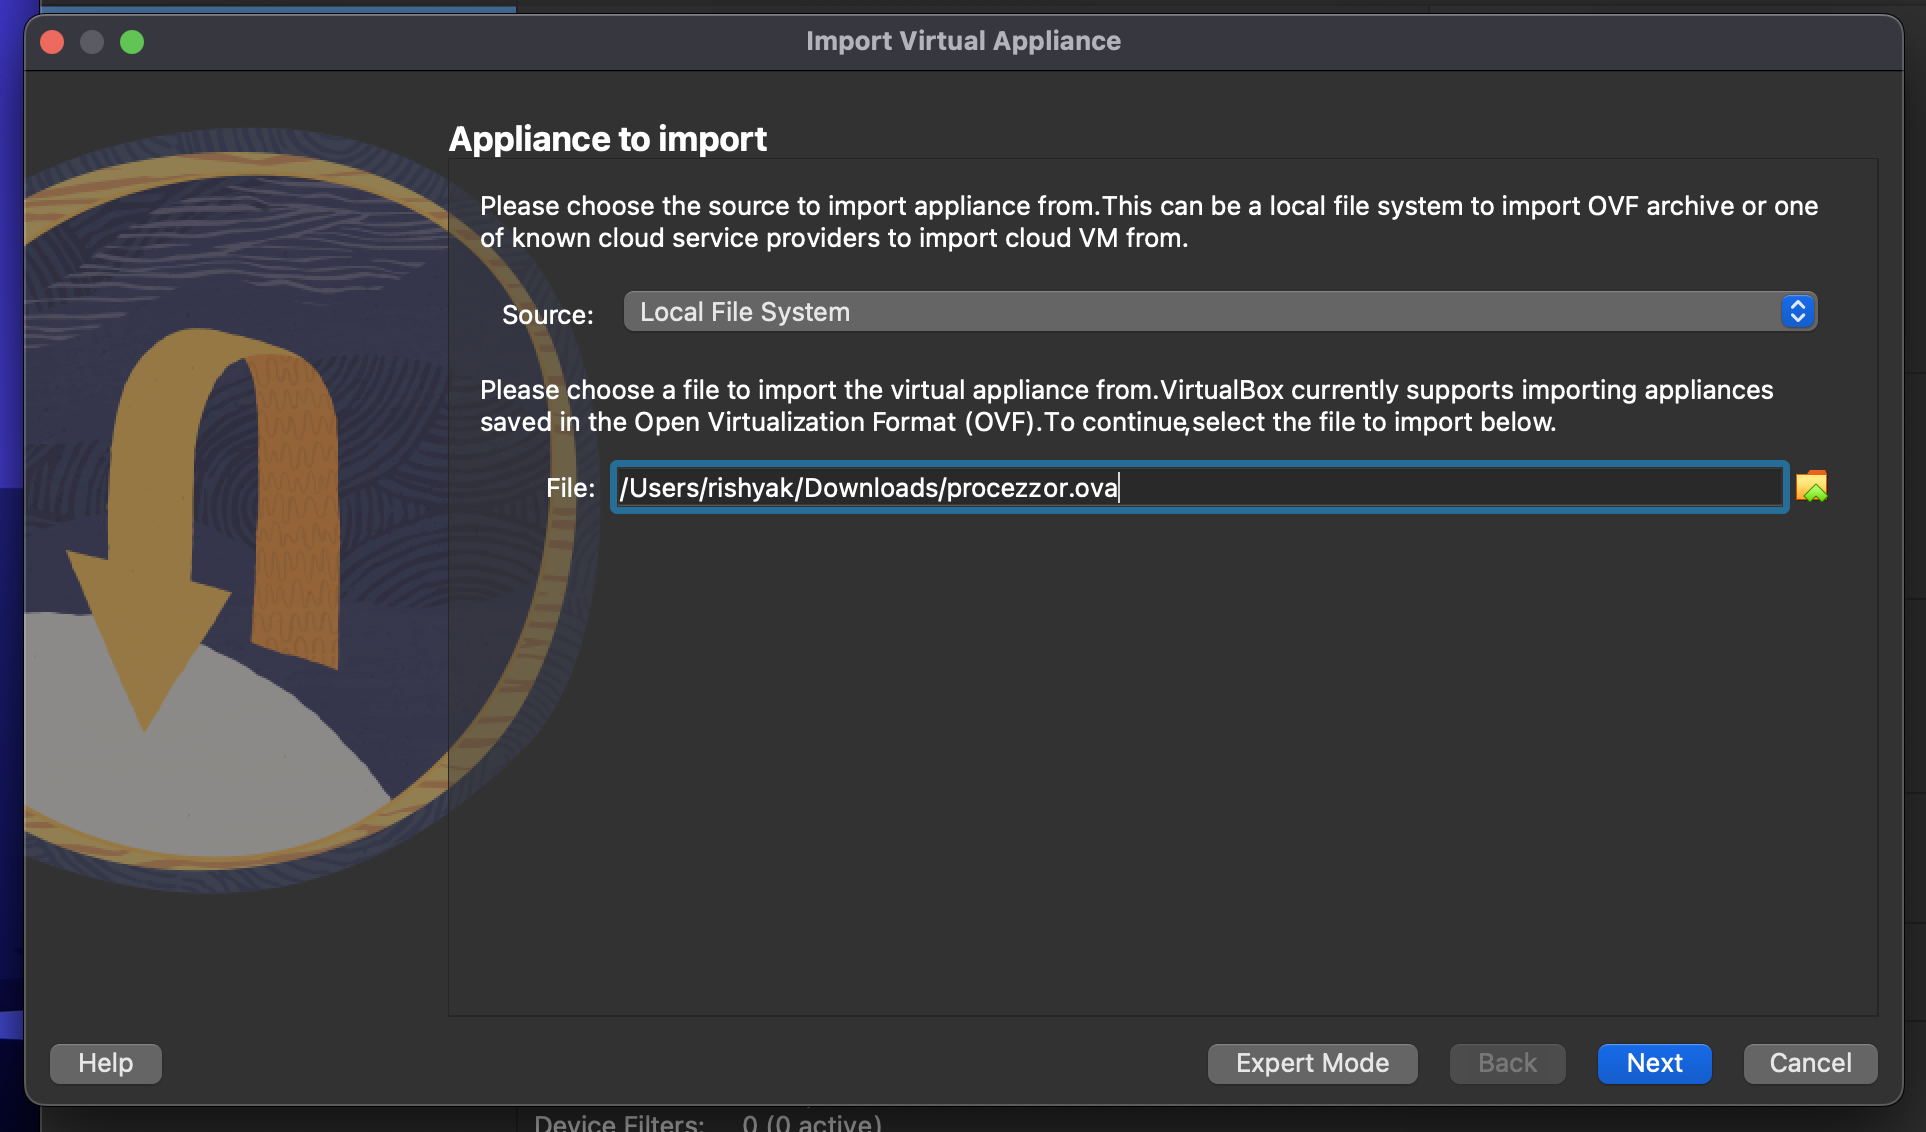
-
Click
-
Keep all the default options, click
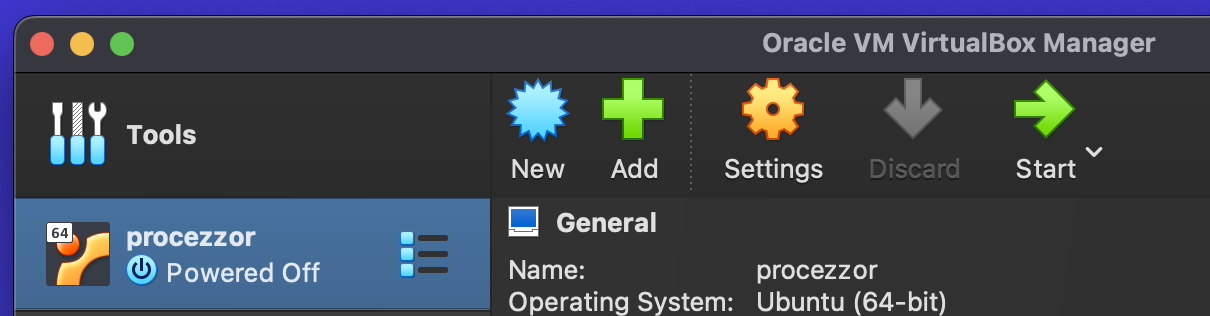
Starting the VM
- Double-click on the VM or press
Logging In
-
You will now be presented with a log-in screen like this:
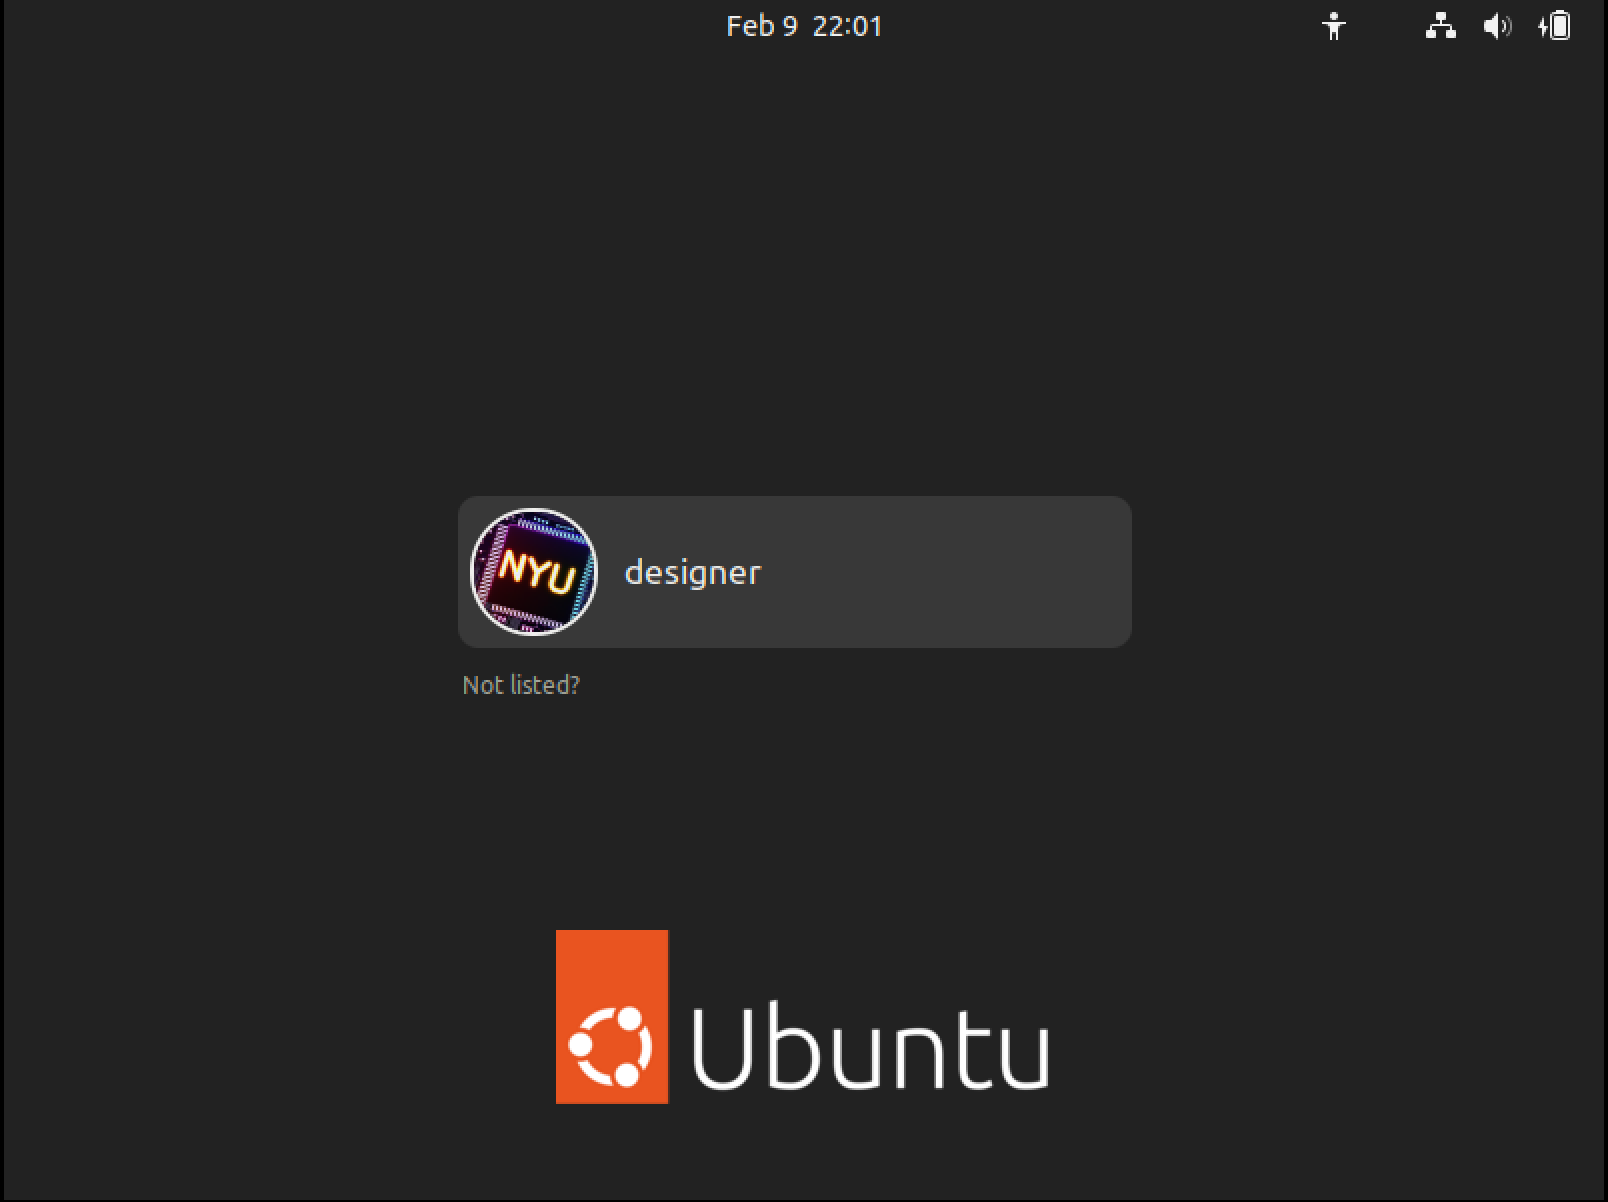
-
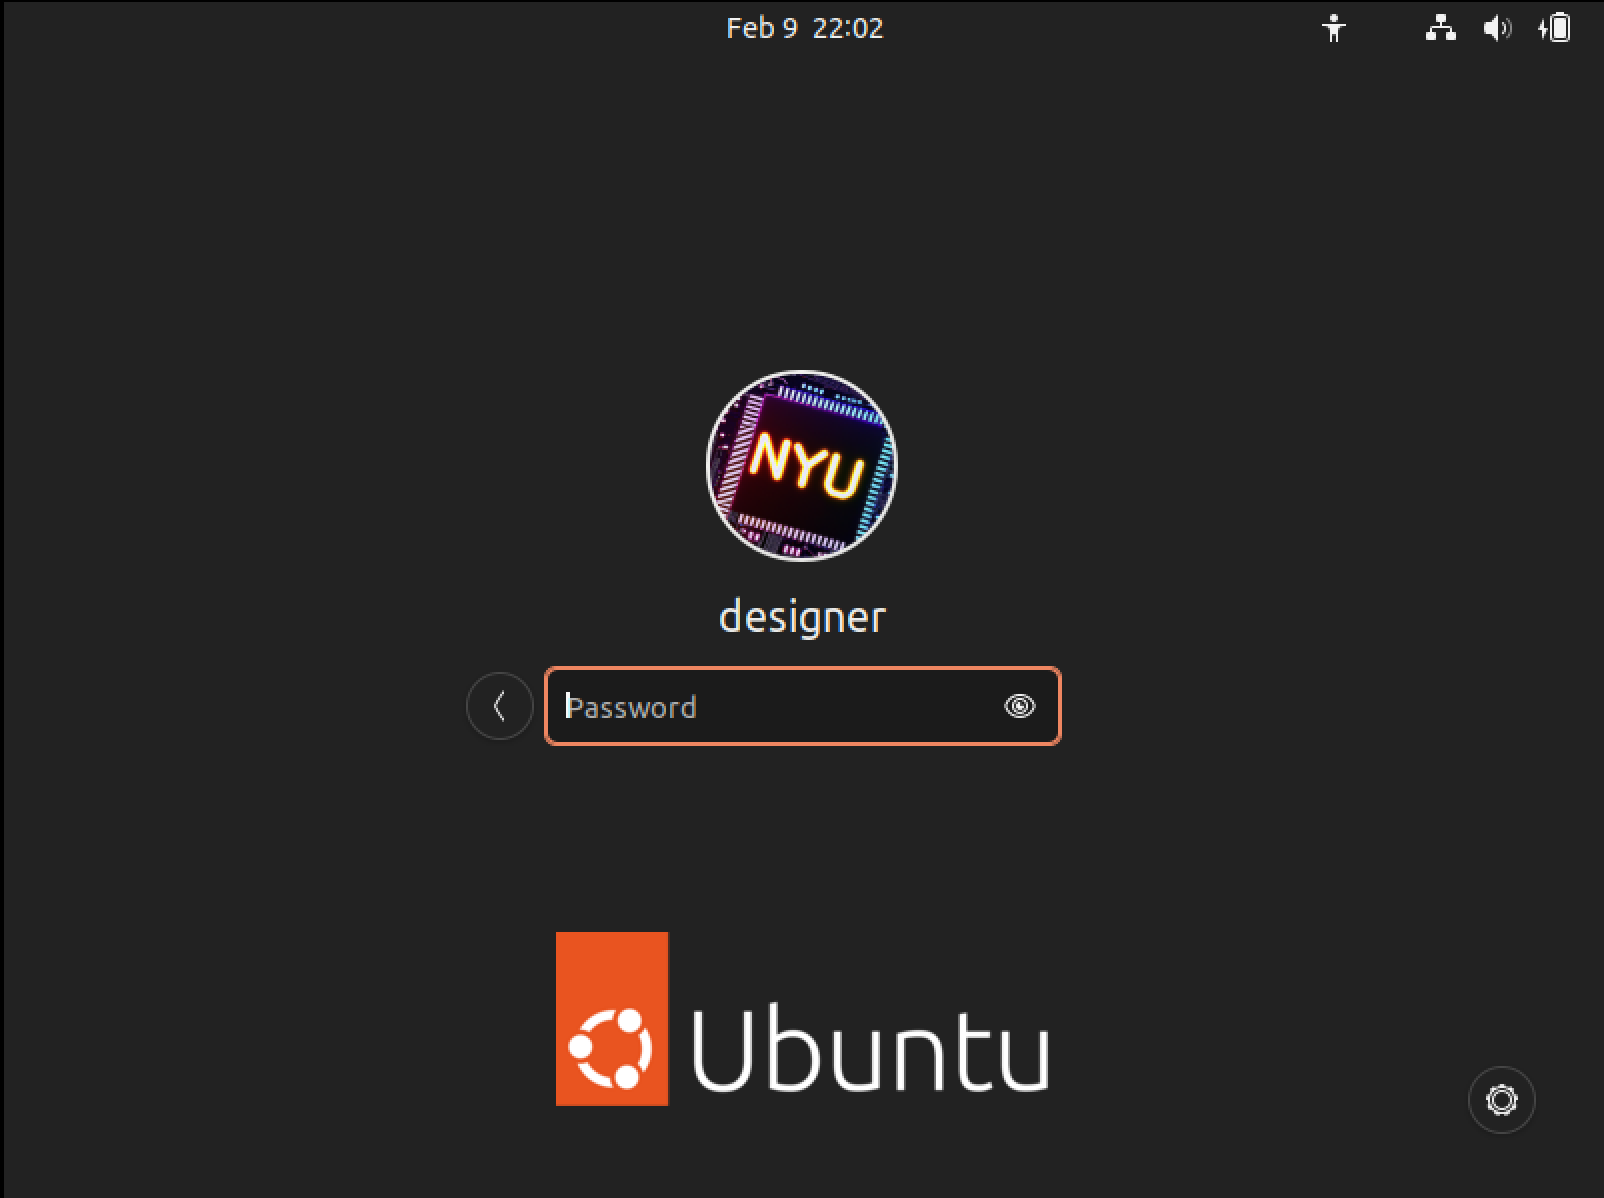
Click on the “designer” user and you will see this:
-
Enter the password “processor” and hit Enter/Return
-
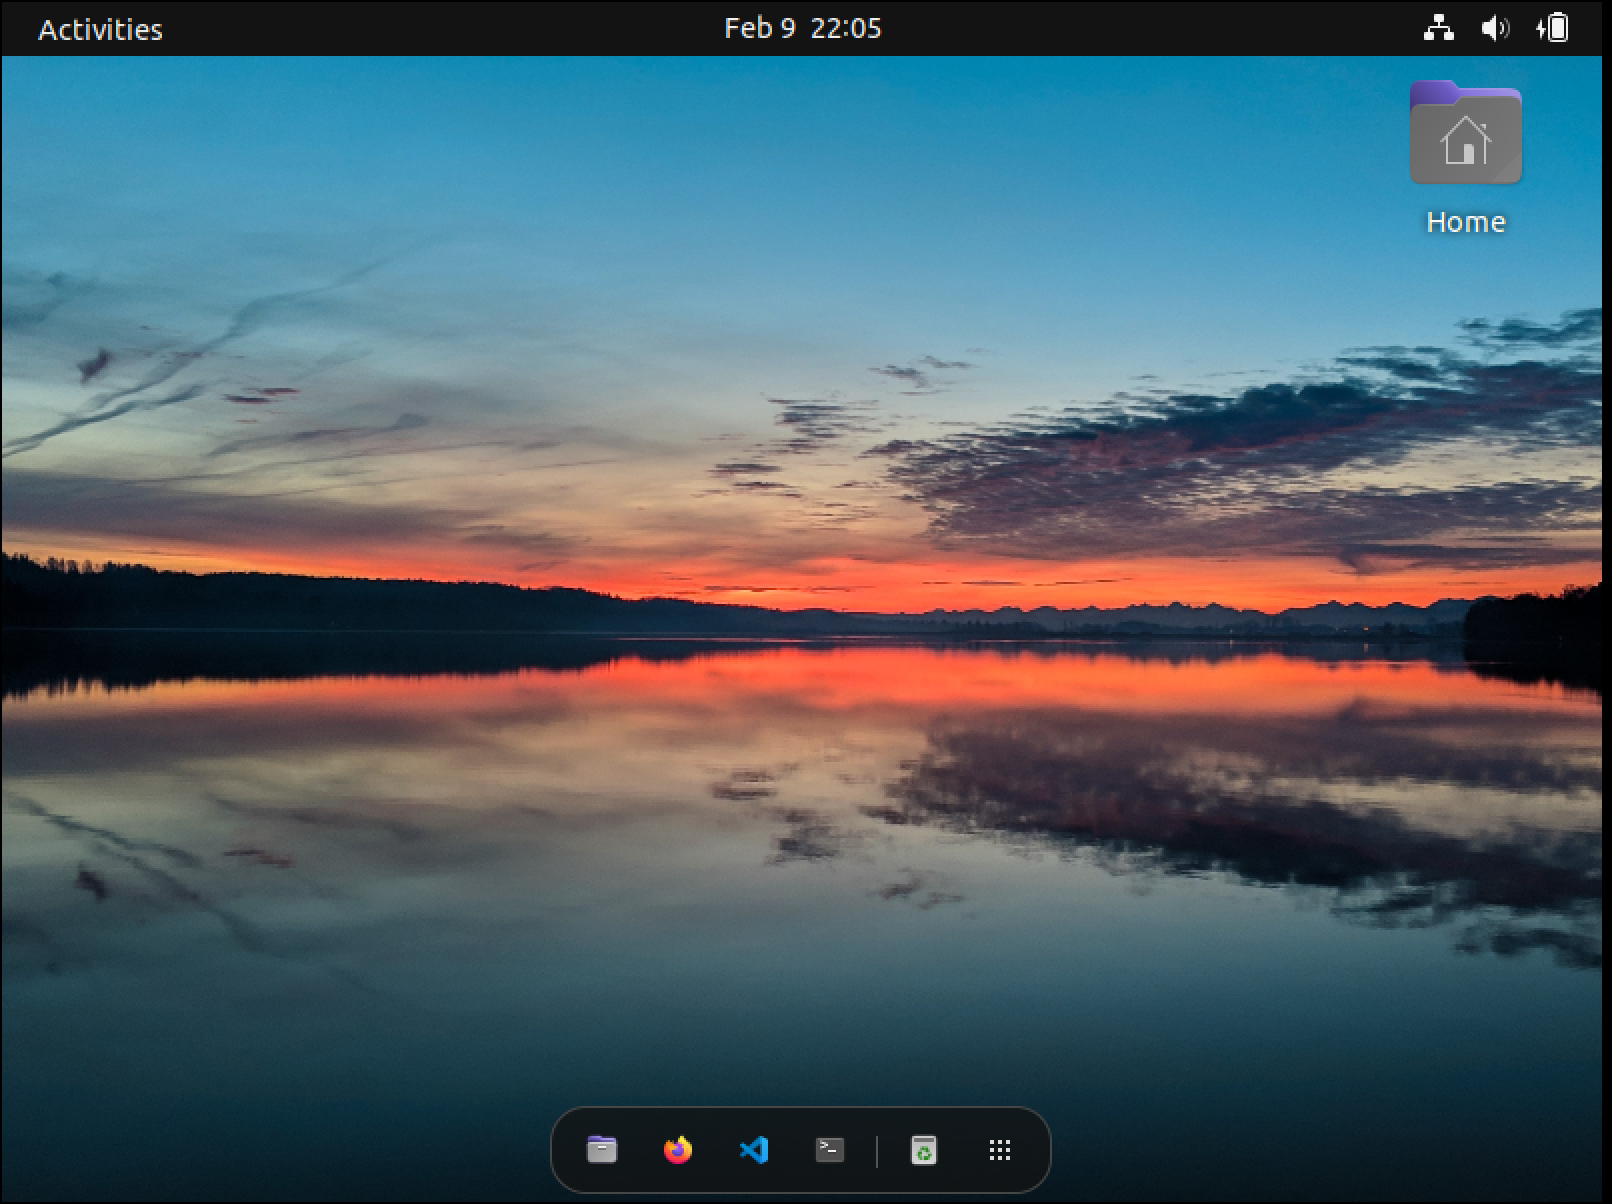
You will now be presented with the Ubuntu homescreen (the wallpaper might be different)
Homescreen
-
You will see the home folder on the Desktop, in the top-right corner
-
On the dock, you will see:
- Files (the file explorer)
- Firefox (browser)
- VS Code (text editor) with some useful extensions:
- C/C++
- CMake and CMake Tools
- GitLens
- System Verilog Language Server
- Terminal
- Recycle Bin
Exploring your VM and Tips
-
Now you have a Linux VM to play around with
-
You can do whatever you want with it
- Since this is not a real computer, you do not have to worry about breaking it so play around
- Worst case: Just re-install the VM
- Word of advice: It’s best to stay away from playing with root, bad things can happen
-
Although, it is recommended that you change the password
- You can do so through settings or by opening the terminal and typing:
passwd -
You can also go through the settings and customise it to your preferences - remember, it is now your virtual computer
-
You should regularly run the following two commands:
-
Update and upgrade packages
sudo apt update && sudo apt upgrade -yupdatefetches the latest information of the installed packagesupgradewill upgrade them if newer versions have been released- the
-yflag simply tells APT that it has permission to upgrade everything and doesn’t have to ask you to say “yes” to each upgrade
-
Update Snap packages
sudo snap refresh -
Snap is Canonical’s3 deployment system
- Ubuntu’s equivalent of the App Store/Play Store/Windows Store
-
-
You can close your VM by clicking on the close button, choosing whether to keep the machine frozen in its current state or shut down completely; you can also use the power options in Ubuntu
Configuring your VM
-
This VM was created for the average computer one may have
-
If you have a more powerful computer, you would benefit from increasing the resources your computer can dedicate to the VM
-
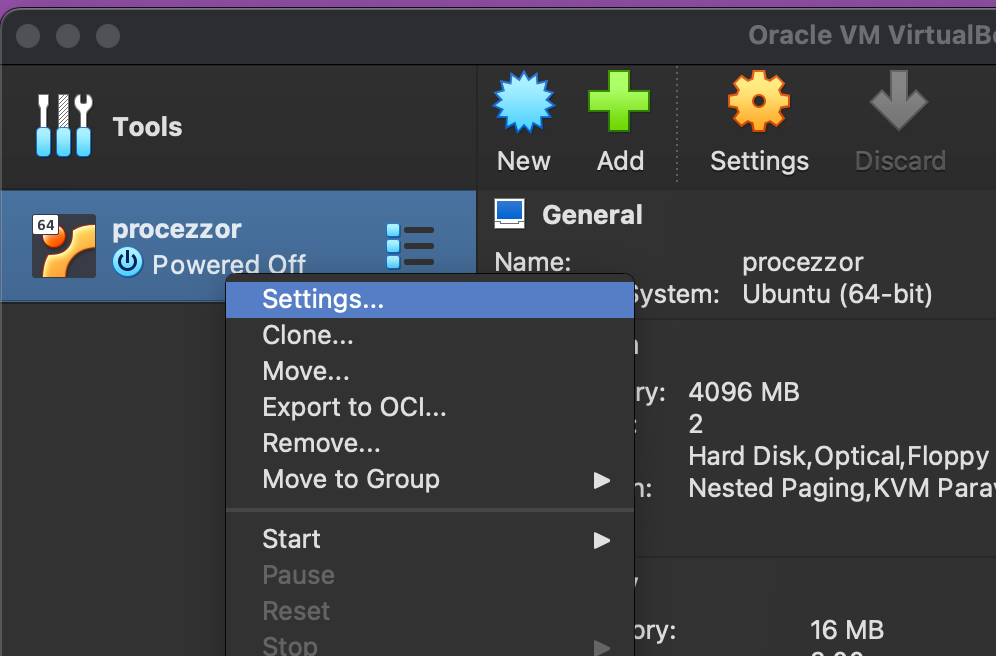
To do so, press Control/Command+S or right-click and then choose “Settings” or click on the bright-orange cog symbol in the ribbon
-
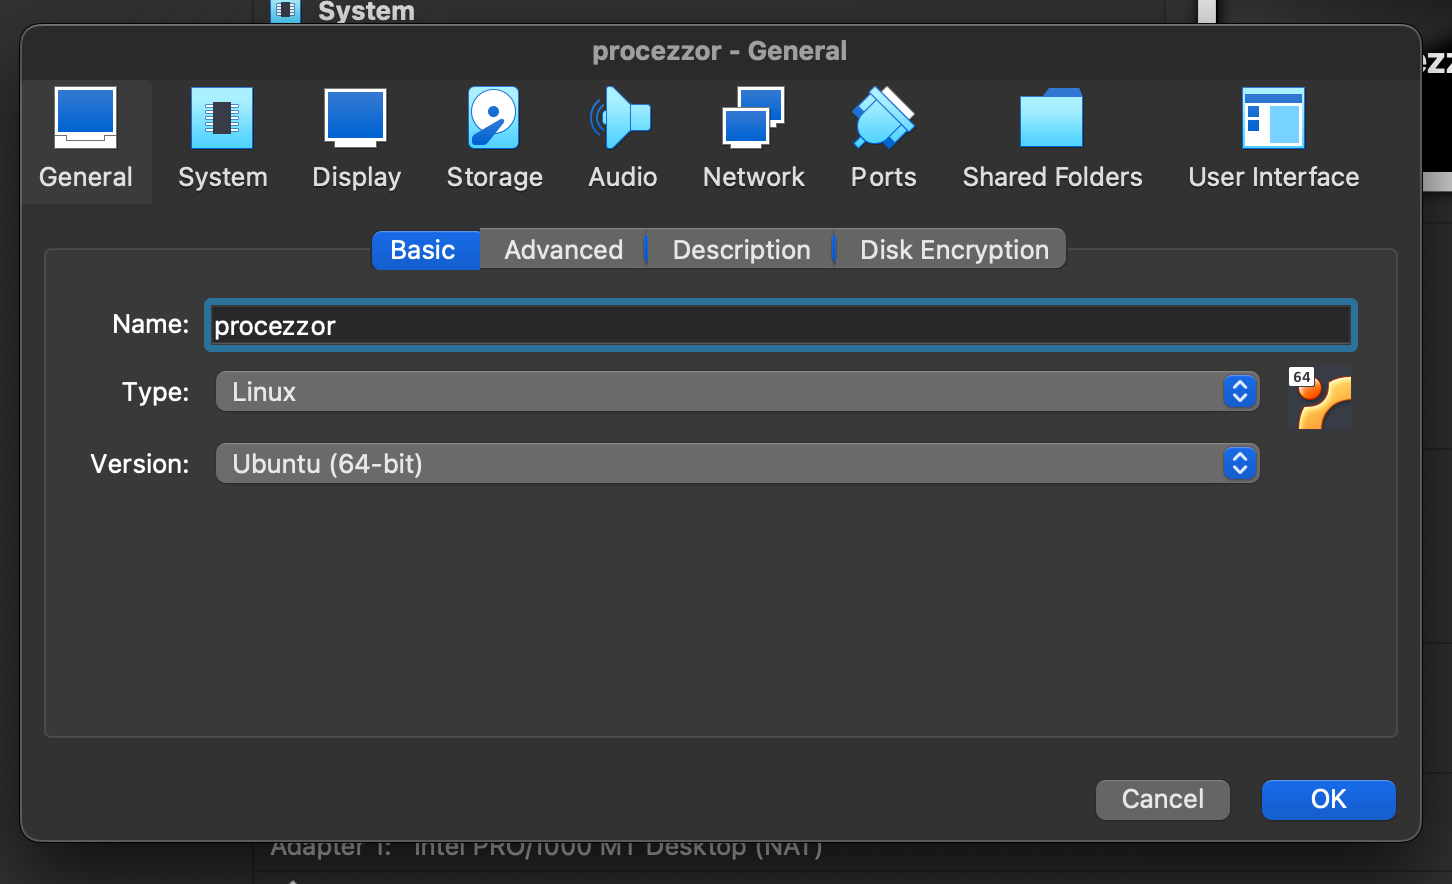
You will see the settings screen
-
Here, you can click through the various sections and configure your VM
- Word of Advice: It is best to not mess with most of these
-
You should look at the “System” and “Display” tabs and adjust the settings for your computer
- It is recommended to give a quarter to a half of all your resources to a VM
-
Play around with these settings and your VM will feel like a native install in no time
-
A hypervisor is software that runs and monitors virtual machines ↩
-
The file contains everything you need to begin working, hence the size ↩
-
The company that develops and maintains Ubuntu ↩